
If they catch the old furniture, you have to spend a fortune for them in an antique shop. With this technique you can simulate aging wood and antique-looking furniture.
Technique to create old looking furniture
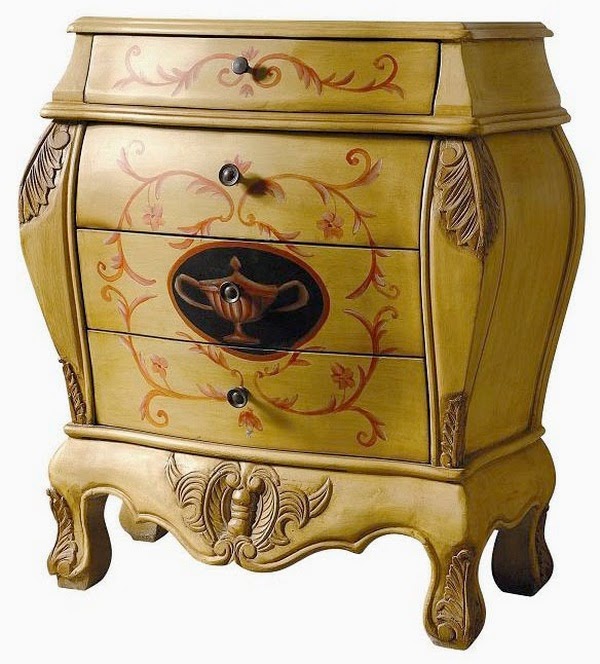
Those who worship the word “new” will surely be asking “why would we want to make furniture look old?”. The truth is that aging of the furniture is a technique that gives them, at least visually, that old perception of objects filled with history and way of life, even if only one or two years from its making.
Learn to make this wood aging technique using paint and simple elements.
Preparing the cabinet
The first thing to do is prepare your cushions removing furniture and accessories such as handles, hinges or whatever you have. Then we clean it with a cloth soaked in warm water and neutral white soap, and rinsed it with a soft cloth dampened with clean warm water. After letting it dry, we start with the procedure.
Create marks the passage of time in furniture
In addition to painting, you can create brands that take away from the new to the furniture. Thick chains are ideal for this, just hit the furniture in one or two sectors with the chain, creating nicks and sink marks in texture that will give the appearance of aged.
How to age wood with paint
For the aged with paint technique need only six elements:
– White acrylic paint
– Acrylic paint coffee or chocolate
– 1 brush or roller to the application,
– Primer to seal the wood
– 1 white candle common than we use to illuminate
– Fine sandpaper
Sand the wood: After cleaning and allow to dry the furniture, will give you a full sanded to bare wood rather receptive. Be sure to do so gently and in the direction of the grain: not looking down the wood, but remove varnish and paint to open your pores and allow better later work. After sanding, remove the dust with a damp cloth and let dry for a moment.
Primer: Then comes the turn of the primer (primer application or fixer-sealer to water): This product is absorbed into the wood, sealing its pores, and allows a better job finishing back of the painting, while also protecting wood. Primer applied in a thin layer on the entire surface of the cabinet and allowed to dry as indicated by the manufacturer.
Basic Painting: The next step is to place the base paint. In this case, our color is darker (chocolate), but you can swap them as you like. Applied in two coats to cover perfectly the cabinet, leaving both dry between each layer, and then passing the second.
Pickling: base already very dry, rub a wax candle banking some furniture sectors. These are the sites that will be visible base color, so scraping the wax should be simple, one-pass or two, and in places where the passage of time had left their marks.
Then simply apply the lighter color above, in one or two simple layers to cover the furniture. Already well paint dry, sandpaper happens again (or a small plastic bristle brush or metal firm) to remove parts of the painting, leaving the base to the eye and giving the cabinet that vintage look. Reassemble pads, handles, hinges or what had taken before, and enjoy this furniture, antique look.
0 comments:
Post a Comment